
Lawn Mower Blade Sharpening post will explain the step by step process for your Lawn Mower blade sharpening.
It is a good practice to inspect the cutting blade and the blade adapter once a week OR if you strike a foreign object. Replace OR rectify if necessary.
You can watch the video below OR scroll down to see the step by step instructions.
If you like it please subscribe for more interesting videos to my YouTube channel GR Solutions 360
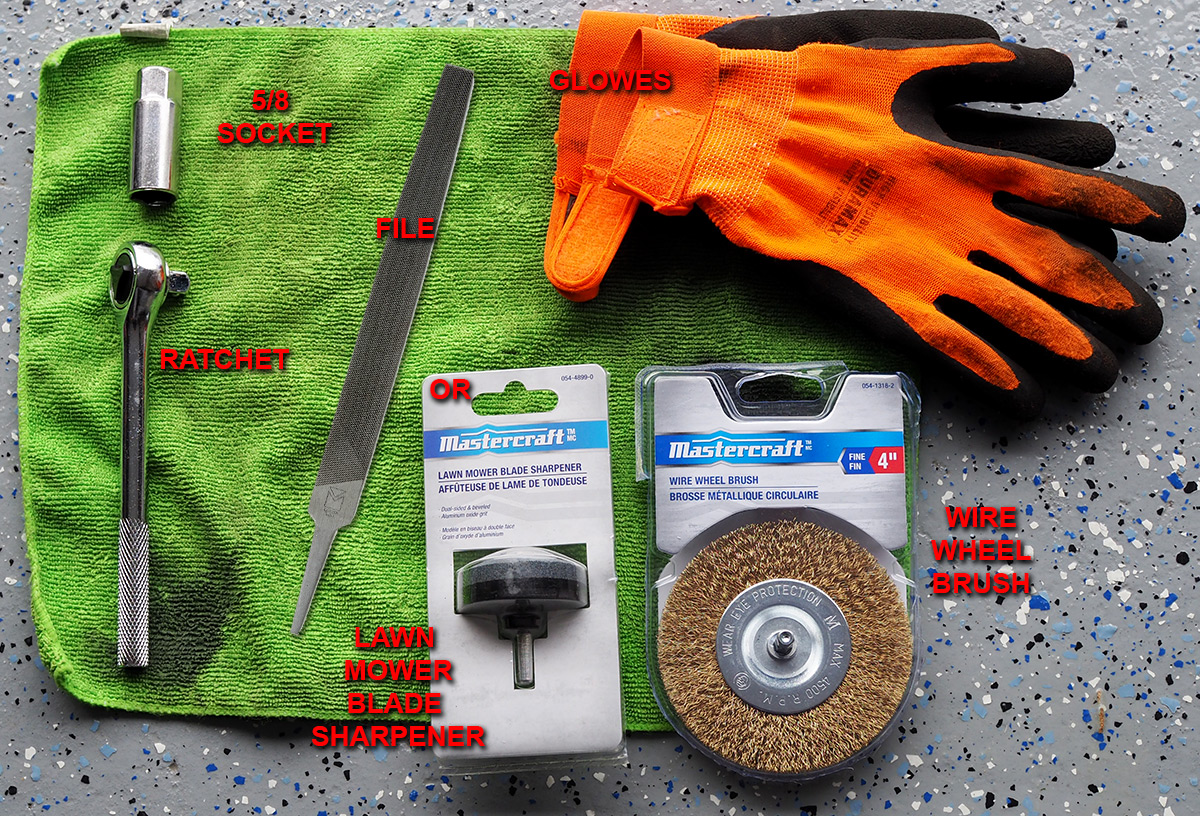
First prepare the tools.
• Ratchet
• 5/8 in socket.
• A pair of thick fabric gloves or working leather gloves.
• Rag
• File OR Multi-Sharp Rotary Lawn Mower Blade Sharpener
• Wire wheel brush
Second … now we can start the Lawn Mower Blade Sharpening / Replacement job.
Be sure to have the engine cool at this point.
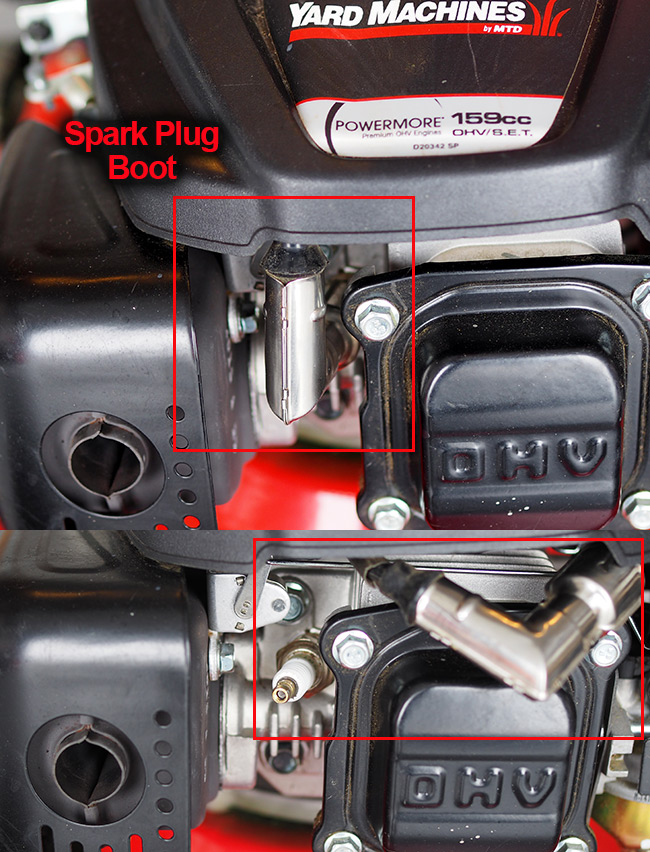
1) Disconnect the spark plug boot from the spark plug and place the boot away from spark head.
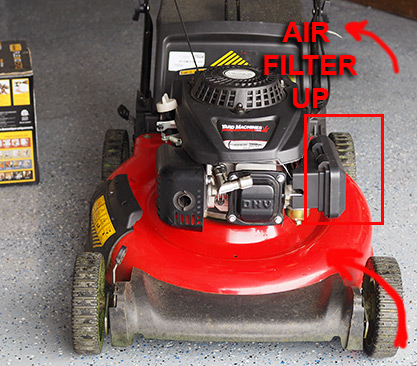
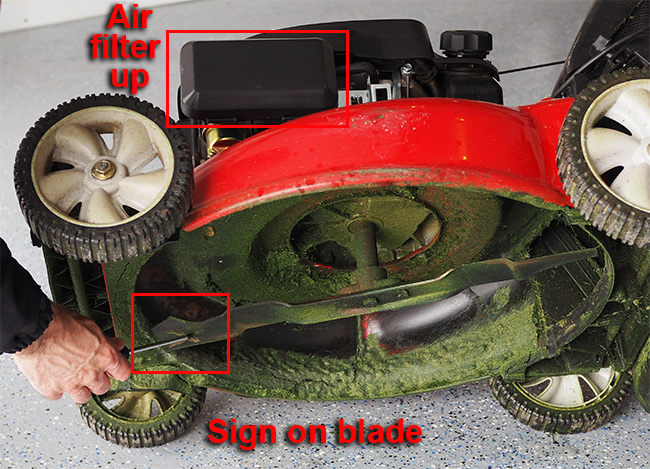
2) Turn mower on its side by keeping the air filter and the carburetor facing up.
3) MAKE A SIGN ON THE BOTTOM PART OF THE BLADE. (side facing down when mower in service).
NOTE: Protect your hands with a pair of thick fabric or leather gloves when handle the cutting blade.
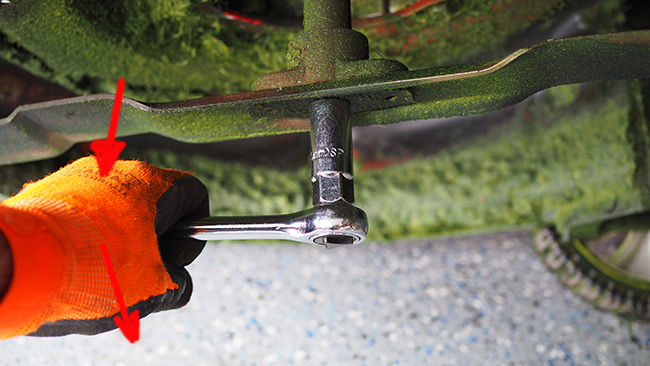
4) Remove the Bolt and the Blade bell support which fixes the blade in place.

5) Remove the cutting blade and the Blade adapter from crankshaft by turning counter-clockwise.
Inspect the blade and the blade adapter for eventual cracks. If any present REPLACE the part with a new one.

6) Clean the blade using a manual metallic brush or a wire wheel brush.
DO NOT REMOVE THE SIGN YOU DID ON STEP 3

7) Test the blade balance. You can do that by using a screw fixed in a vertical support.
Make a mark to the heavier side of blade to avoid confusion.

8) Fix the blade by using a vise.
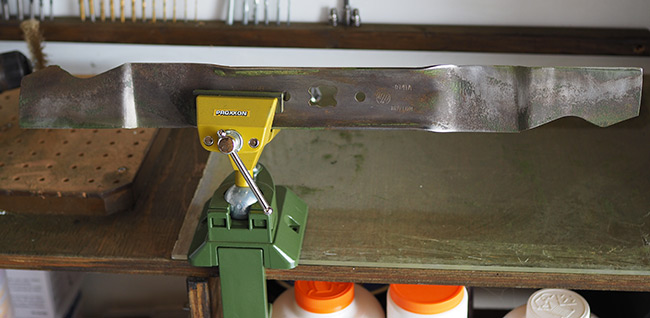
9) Start sharpening the blade.
At this point you will need to wear protection glasses.
You can sharpen the blade by hand using a file OR using Multi-Sharp Rotary Lawn Mower Blade Sharpener. (see img. 1)
10) Start to sharpen the blade on the lighter side.
Try to sharpen the blade by removing A MINIMUM QUANTITY OF MATERIAL.
Keep the original angle of grind.
11) Move to the (initial) heavier side and start the sharpening.
USUALLY you will have to remove more material from this side.
When done check the balance again.
12) If blade not balanced continue to sharpen ON THE HEAVIER side of the blade.
CHECK OFTEN FOR BALANCE.
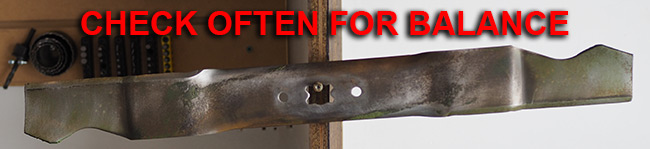
NOTE: AN UNBALANCED BLADE will cause vibrations when rotates at high speeds. This can damage the mower OR can crack the blade and cause personal injury.
13) Add some oil on the crankshaft and fix (slide) the blade adapter in place.
14) Place the blade on the adapter. Keep the side of blade marked at point 3 facing DOWN.
Check for the blade to be seated and aligned with the blade adapter.
15) Add the blade bell support on the blade.
Align the notches from the blade bell support with he holes from blade.
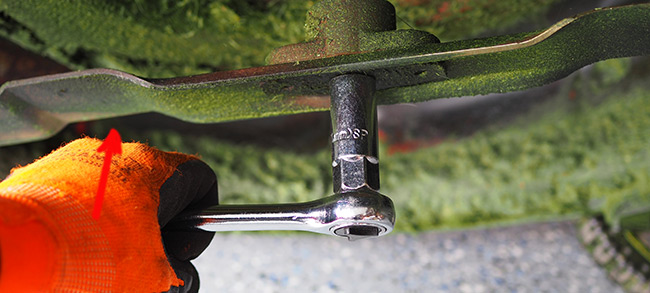
16) Replace the Bolt with a new one (from same grade – tensile strength).
Tighten the bolt to MIN torque 450 in/lbs AND NO MORE THAN 600in/lb by turning clockwise.
It is a good practice to check from time to time on the blade bolt for the correct torque.
Move the Lawn Mower OUTSIDE OF CLOSED SPACES and start the engine.
Checked for a smooth run (no excessive vibrations).
Do a test by cutting a small section of the lawn. Check for a nice cut (not rip) at the top edge of the grass.
Seems like we are DONE here with Lawn Mower Blade Sharpening job.
You can view and subscribe for more interesting videos to my YouTube channel GR Solutions 360
Please navigate to GR Solutions 360 – How TO – section to find some more helpful and worth reading articles.